Step 1: Setup a new App in Laravel Forge
Set the Root Domain, Web Directory and Use Website Isolation
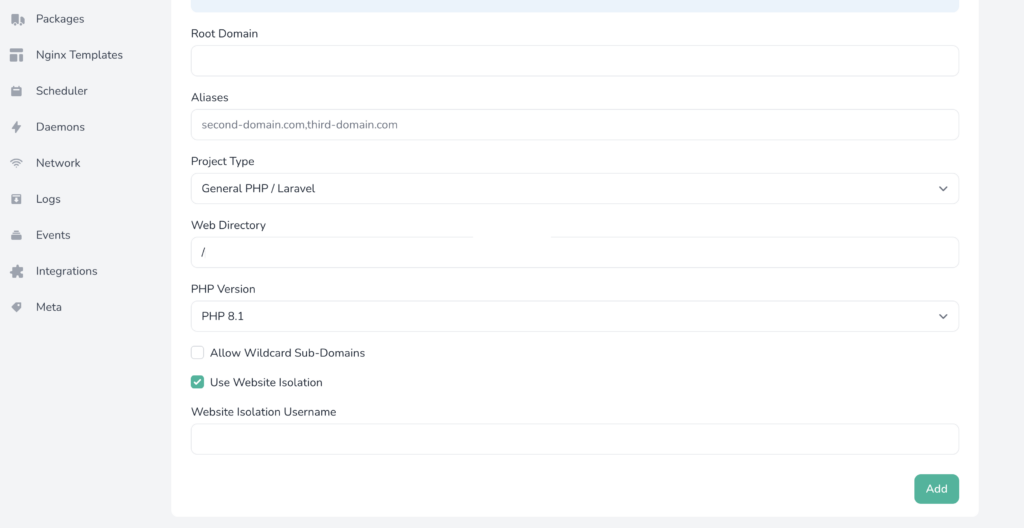
Its important to change the Web Directory from /Public to /
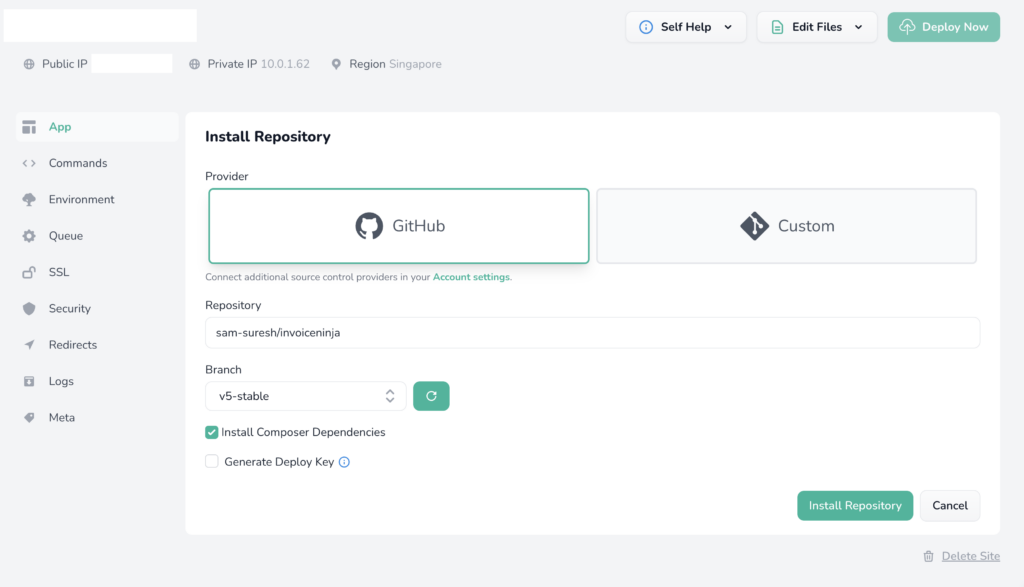
Step 2: Now pull the Invoice Ninja app from Github. To do this first you need to form official invoice ninja repo in Github. You also should have connected your Github to Laravel Forge.
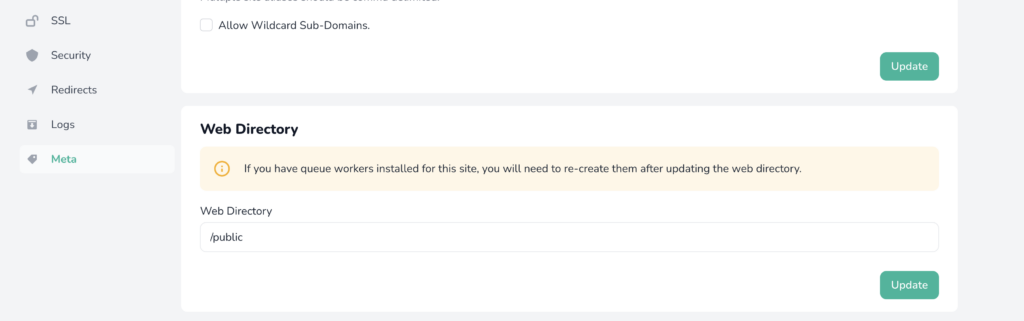
Step 3: Now we need change the Meta to change the Web Directory back to /public from /
Step 4: Update environment data:
You need create new Database and update details in line 11 to 15 on the image below. Besides, site URL, SMTP details need to be updated as well. If the site is behind SSL Proxy or load balancer, then add this line at the end:
TRUSTED_PROXIES=*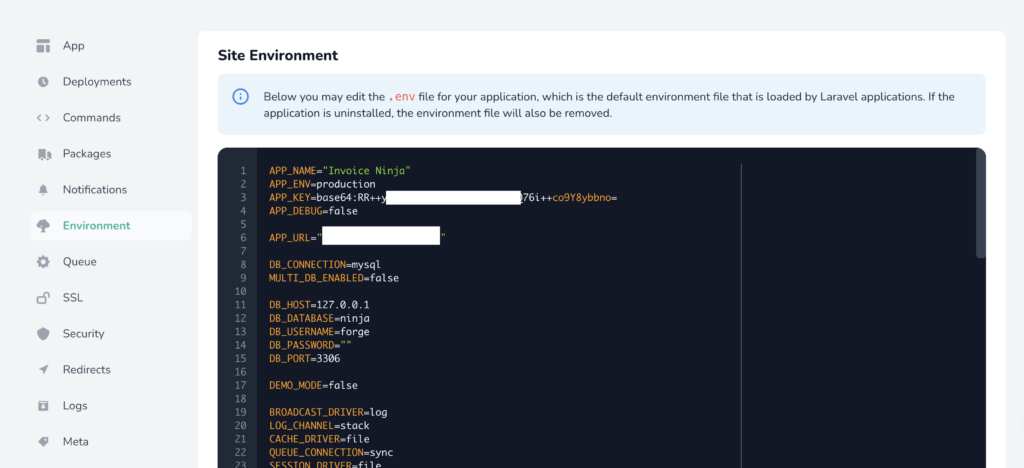
Step 5: SSH to your Server:
ssh forge@your-server-ipStep 6: Run database installation.
sudo php artisan migrate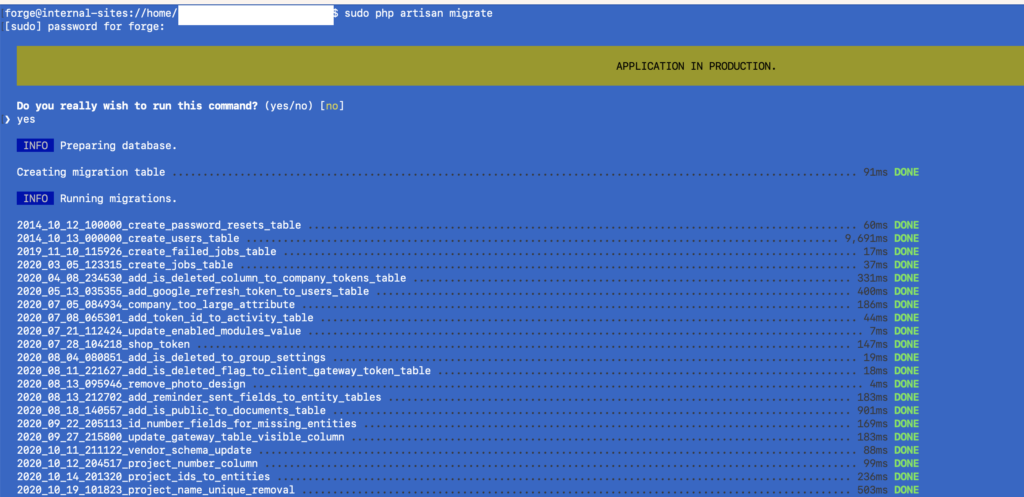
Step 7:
You should see the web installer on the browser now:
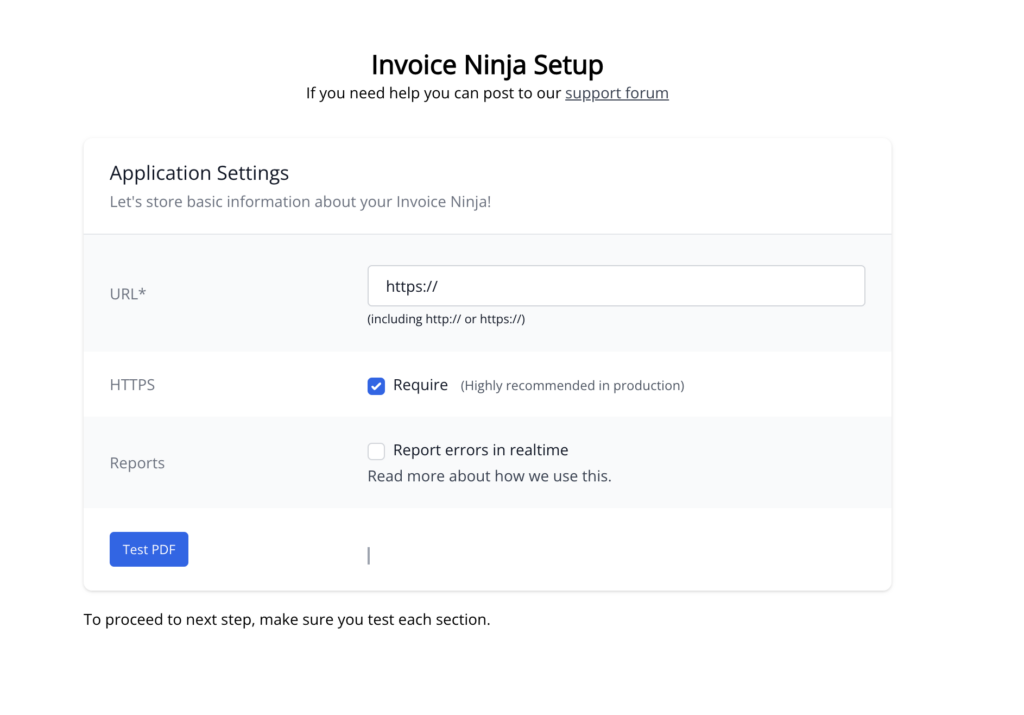
Continue the installation process and finish it.
At the end, if you see an error page like this, probably its the permission issue. You can fix this by running this command. Make sure change the path and username.
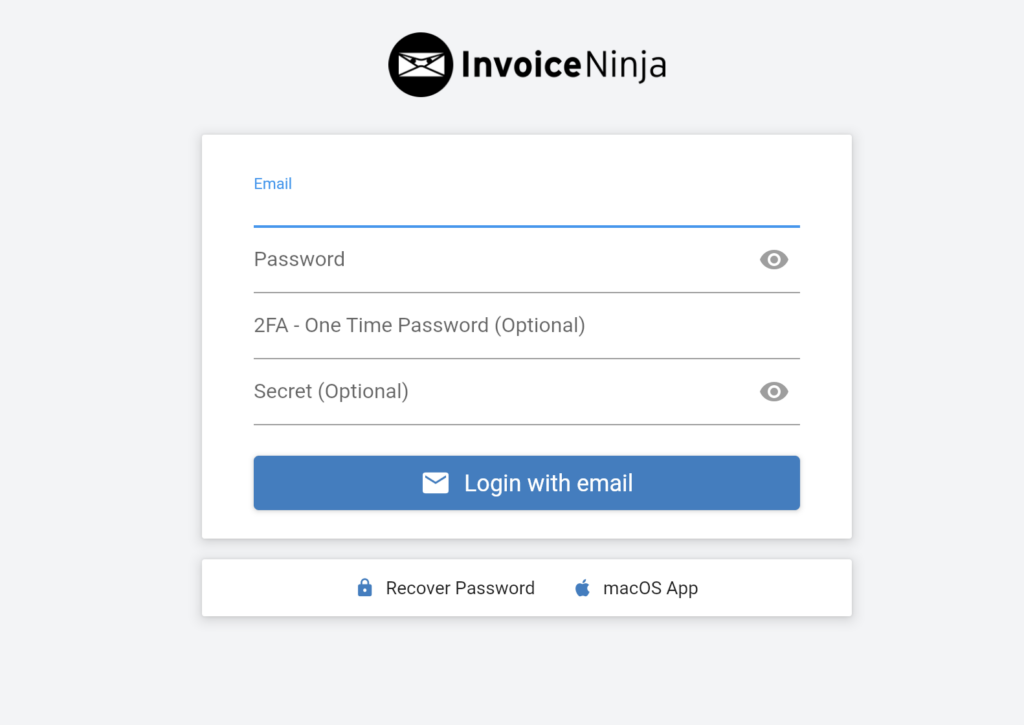
cd /home/myuser/myninja.com/ && sudo chown -R myuser:myuser *And the invoiceninja should load properly now:
If you face any issue, comment below.